Standard vehicle equipment has come a long, long way. It wasn’t long ago that air bags and air conditioning became commonplace. Now the standard entry-level car can be equipped with countless niceties. Heated seats, adaptive cruise control, Apple CarPlay and so on are all commonplace. We’ve always been a little salty that our 2018 Lexus GX460, which cost luxury-SUV money when new despite us buying it at the price of a used 4Runner, didn’t come with remote start. To remedy this, Accessorides graciously sent over their kit for me to try out on the project.

First world problems
Not having remote start on a 2018 Lexus seems like a bougie complaint. Consider that the feature is available on a sub-$20k Nissan Sentra, for perspective. Here in the Northeast, the interior of a vehicle can be dangerously frigid or scorching hot depending on the time of year and amount of time it has been sitting. Should you not have the luxury of a garage, it can be problematic. Making the cabin comfortable prior to departure requires running outside to start the vehicle well in advance of when you need to leave. Minor issue, but throw a baby that needs full-time supervision into the mix and it gets tricky. Plus, if it’s raining or snowing, who wants to go outside twice?

The problem & the solution
Lexus tied the GX460’s remote start capability into its 3G service for a stretch, a service it has since retired. The remedy for this is to add a module to the Lexus’ brain. Doing so basically hard-wires the capability and ties remote directly to the key fob. A workaround of brilliant simplicity.
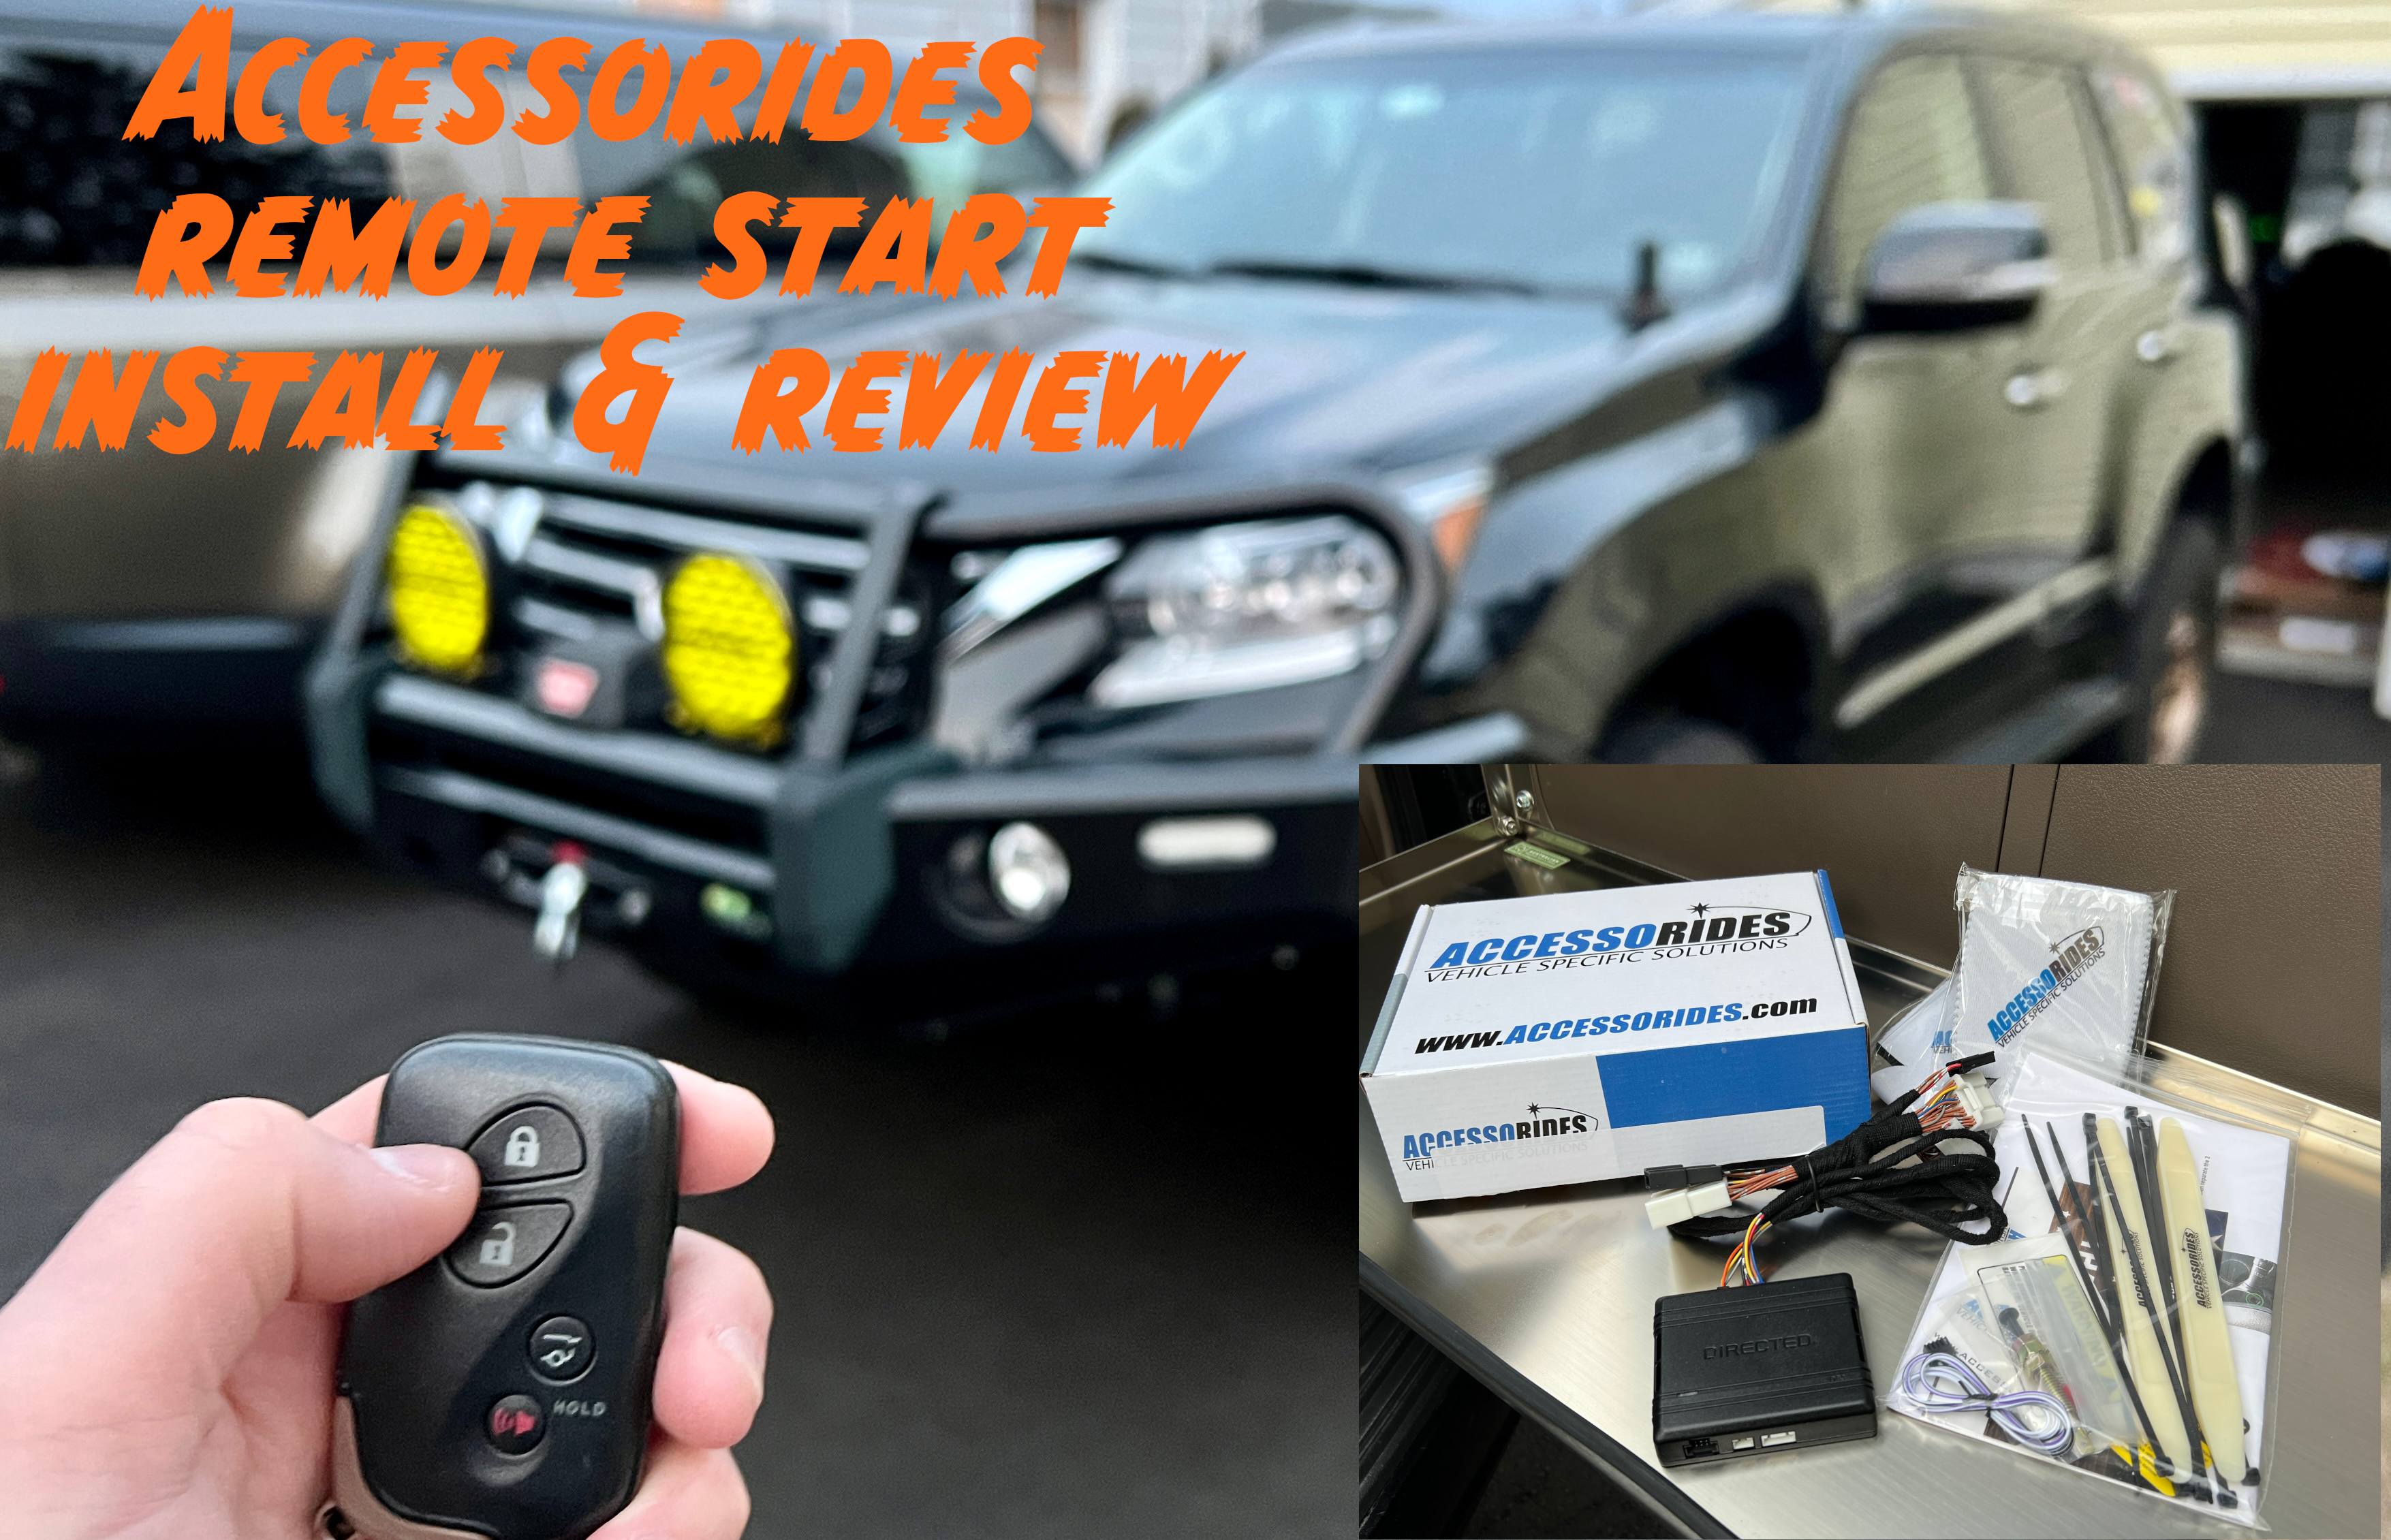
Accessorides’ solution basically piggybacks off the computer between the start button and the BCM. This is as subtle a solution as they come. The best benefit of doing it this way is that instead of remote start requiring an extra key fob. Simply pressing the OEM fob three times activates the remote starter.
The kit is 100% plug-and-play. Included in the box is all of the needed equipment: The module, instructions, and two trim removal tools. You’ll need to grab a phillips head screwdriver and 10mm socket from your own toolbox. And a beer to place inside the Accessorides-branded gift koozie that they send with the kit.

Installation
Even for an only-moderately-capable guy like myself when it comes to things like these, installation was fairly straightforward. Here’s the long and the short of it:
- Slide the driver seat as far back as you can
- Remove the floor mats and anything in the way of driver the footwell
- Use a trim removal tool to pull the driver-side center tunnel panel off
- Lift off the kick panel that lives along the door sill
- Pull away the trim that lives below the dashboard. Pop open the small screw cover at the bottom right and remove the screw. Then remove the screw that holds the black shroud underneath the center of the panel below the steering wheel. Next, remove the screw underneath the steering column. Pry the black piece of plastic off from under the panel.
- Use the trim removal tool to pull back the kick panel left of the emergency brake. Remove the screw that sits behind it.
- Turn the ignition on to accessory mode. Extend the steering wheel and move it to its furthest outward position.
- Crank the steering wheel left, and remove the screw behind it. Turn it to the right and do the same. Remove the top and bottom steering column covers, being careful to not hit the electric adjuster on the left side.
- Pull the bottom portion of the dashboard away from its mounts. Be careful to not disrupt any of the wiring behind it
- Locate the black seven-pin connector behind and to the right of the steering column. Unplug this, and plug the Accessorides connector in.
- Run the Accessorides wiring and module behind the metal bars in the dash
- Locate the BCM to the left of the steering wheel area. On the right side of the two connection points, unplug the middle unit. Connect it to the Accessorides module, and connect the Accessorides plug to the BCM.
- Test the connection. ?? light turns what color
- Test the system. Close all doors, lock the vehicle, wait thirty seconds, and then hit the lock button three times in a row. The horn will sound twice, and after a few seconds it will turn on.
- Cable tie the module and wiring so it stays in place.
- Reinstall all of the interior panels
- Revel in the glory

Misc. Notes:
- The vehicle shuts off when you open the door, which is a built-in Toyota/Lexus safety precaution.
- Between the need for the ignition to stay on so the steering wheel remains extended and the open driver door, the two can easily drain the vehicle’s main battery. I found this out the hard way. Fun fact: A 2023 Land Rover Defender 130 P400 didn’t provide the GX460 with enough juice to turn over. My wife’s Mazda CX-5 did. Go figure.
- Make sure you reconnect all of the items you unplugged. The following week, amid freezing temperatures, I stopped to fill the Lexus’ gas tank at a local station. I pushed the gas door release button, and… nothing. Forgetting to plug it back in meant fighting with wires and the dash. In the gas station lot. In cold weather. Less than fun, but my own doing.

2018 GX460, now with remote start!
Adding remote start to a modern vehicle can be pricey and time-consuming. Accessorides has helped made installing this piece of tech on the Lexus GX460 (and other vehicles) inexpensive and easy. We love that it integrates as if it were OEM, too. The kit retails for $299 but is on sale for $199. It’s well worth the price.

Leave a Reply